
Sunday 13 May 2012


Designing My Duplo Picnic Collectible
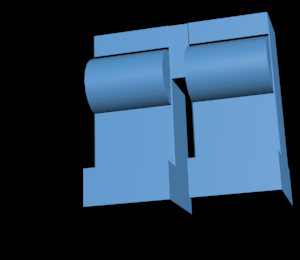
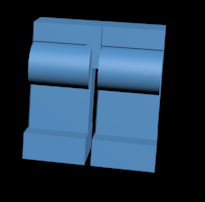
My Attempt at Creating Lego Duplo Legs
Final Render in Photoshop
This character is based on a cricket and seems to be a very popular concept with boys and girls of all ages. His/Her name is " Hopp-i " |
| My Lego Duplo Character in 3d Photoshop . |


Saturday 12 May 2012
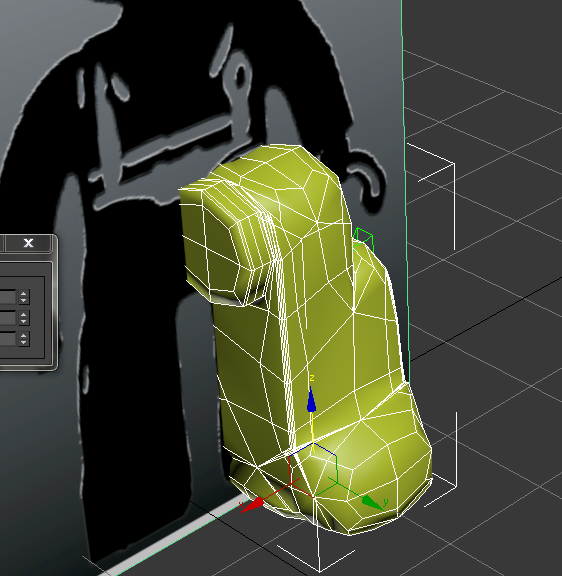
3d Modelling Lego legs


3d Design Project Moodboard

des124-2012-major-project
LEGO lunches
When designing new products we must take influence from the brand which we are designing for and often other objects that exist, man made or in nature. However the Dieter Rams philosophy of "Look but don't copy" is key in this project work. Using the design process you will analyse existing LEGO products from- a manufacture point of view,
- a user point of view and
- an aesthetic point of view.
Under the LEGO brand you must design a range of characters and a product relating to the following choices. The characters may be:
- Stand alone as a play experience beyond meal times
- An integrated part of the eating experience
- integrated with the box as part of a game to map or reward good eating
- LEGO yumyums - Target prise = £9.99. Age category 2-4years (Duplo). This product is based around the parent and child day trip experience. The focus is picnic culture and a stimulus to encourage children to experiment with their food. Children at this age often start to reject food as part of their natural survival instinct around trying new foods and also asserting their personality. Different categories of rejection are reported. Devise an eating experience product and an experiment with food range of characters which focuses on daytrip eating.
Lego Poly-Modelling
Preparation for Modelling the Arms

Modelling a Lego Arm....
Preparation :

(if you have a .dwg of a Lego arm)
Create a plane 20mm by 15mm and place on the origin. Name it the front plane.
Repeat procedure with angular snap rotate tool on z-axis. In top-view, shift and create a copy.In the material editors add 'shaders' which will change the appearance. Locate the appropriate file, and shew shaded material which can be viewed on the arm. Make bitmap double sided so it can be seen from all sides.
Align rectangle on the cuffs, viewed in 'shaded' in the left and front views.
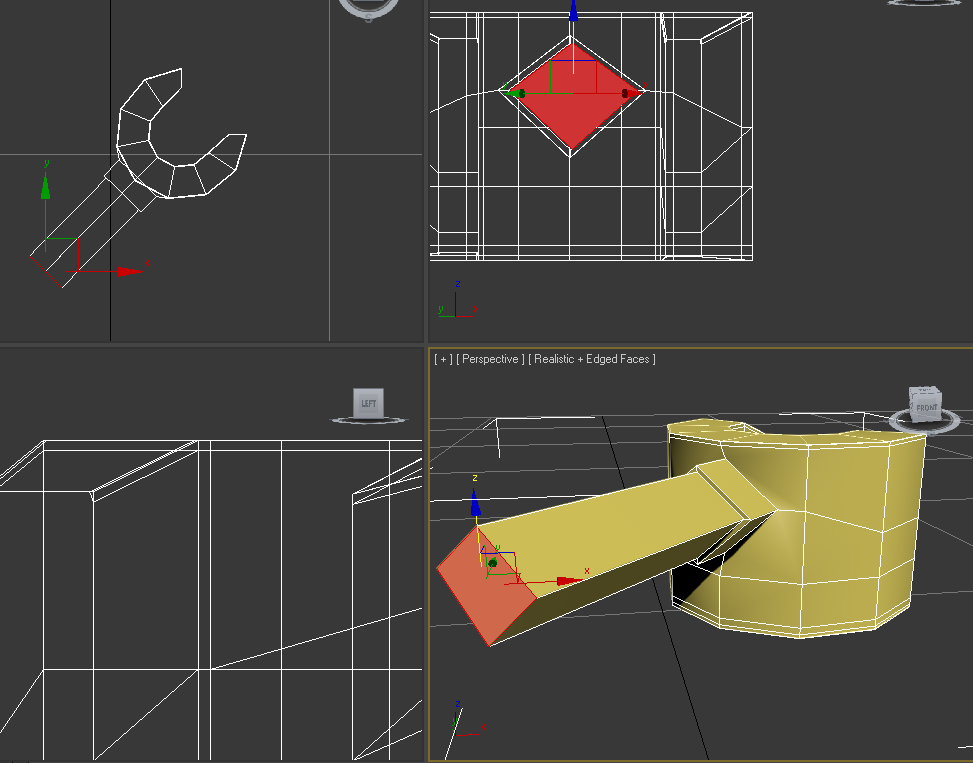
3DS MAX Modelling Lego Arms
Polygon Modelling Lego Arms

Create:
(if you don't have a .dwg of a Lego arm use vernier calipers and measure)
Create a box, 4 by 4 by 4mm. Visually align box with base of picture of the cuff.Convert to editable polygon.
Select edge and with graphite tool, loop and connect with 2 segments at 98% until it resembles a cylinder.
Select all polygons and scale out in line with the image and sculpt to shape. Select the top polygon and move vertically up to elbow joint ready for rotation or modification.

Add a FD222 modifier and using control points to adjust to the right angle. Apply turbosmooth to view.
Extrude and bevel. Tweak it to modify, then manually move, rotate and scale.

Tighten up elbow by selecting the edge, ring, loop and connect. In wire-frame, select edge, loop and move edges down to regain organic shape of shoulder. Bring in the vertices of the shoulder slightly and align with the template of the arm with the move and scale tools. Check all alignments on grid and check the form all over the arm.

In order to see through it, change in object properties and make it see-through in poly level.
 For extra refinement add extra geometry and inset polygon. Adapt to a square shape by creating another 3 by 3 rectangle which can be orientated to compare to my inset poly and align vertices.
 Extrude all polygons by 0.1mm, then only selecting the central polygon extrude out to the corresponding shape of the template.
 Select edges, ring and connect to tighten geometry. To adjust further, select all poly and scale out in x+y-axis to the correct size. Select end poly and adjust and scale.

Inset another polygon on the base of the cuff and extrude upwards negatively about 5mm as measured with verniers. Add detail by edge selection as before and connect to about 98%.

The Final Render


Friday 11 May 2012
Modelling Lego Parts
Modelling Hands for the Ubiquitous Lego Man

Starting off with a tube, 3mm radius, 1.5mm radius and height 4mm. 8 sides and Slice is on at 270 degrees. Then in editable poly, select edge and ring. Loop and connect.

Select edge for height definition. 3 loops at 95. Modify and Turbosmooth.

Top view vertices, select fingertip area and move vertices to refine fingers.

In wireframe view, ctrl-select clusters of vertices and mould them down.
For the cuff, add a chamfer by selecting certain vertices and adjust in the z-axis. This has created a polygon which will be useful for extrusion of geometry. However I had to try and square it up.

 Move all mid-section vertices downwards.
Select polygon for extrusion by 1mm.
Make the polygon planar as it is not perpendicular to the geometry of the hand.
Insert a polygon inside the extruded poly and extrude again.
Select edge and ring at insert edge and connect.
Cut the triangular polygon at the insert and cut into two.
 Scale out the perpendicular vertices and a large cylindrical form is gained. Connect the edges.
The result was flawed due to verticular error, I will have to redo but this is how it looks in Final Render
3ds Max Modelling A Lego Body
Polygon Modelling A Lego Body

 First I begin modelling a plane over a template that I'd already created. Convert to editable polygon.
With the FD2*2*2 modifier I can scale the control points and match the lines with the template.
 Selecting the edges, I can Shift and drag to the required size.
Modified using symmetry and mirrored on the z axis.

After connecting my edges around the arm area, I delete that particular area's polygons.
 |
| After adding the Shell modifier the inside geometry is a little skewed. |
 | ||||||
| Needed to Straighten Corners |

 |
| Sorry, couldn't wait to see the 1st render! |
 |
| Circling the arm-hole. |
From the first render, the arm-hole is obviously not lego style so scaling and constraining all at the same time, I attempt to make it more circular. I can improve it further, I hope.

Now to make the hole for the neck. Extrude top four polygons 6mm high. Then choose edge, ring and connect to give it a more defined edge.
With no constraints, scale in the vertices of the neck to give it a more octagonal shape, trying to make the vertices as equi-distant as possible.

The Final Render
Subscribe to:
Posts (Atom)